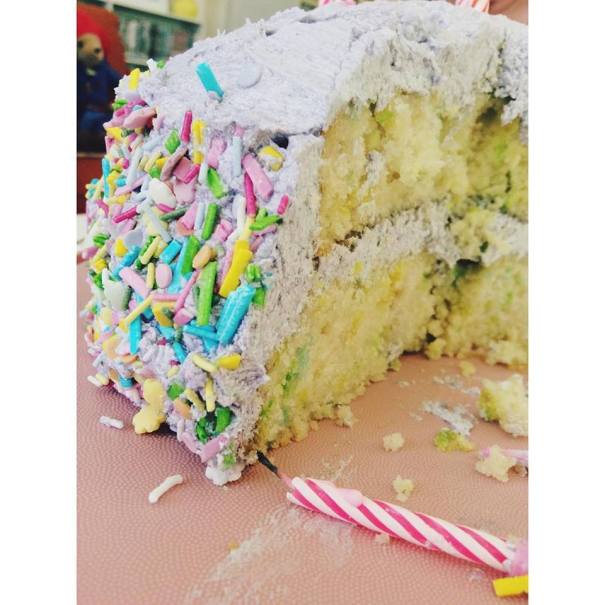
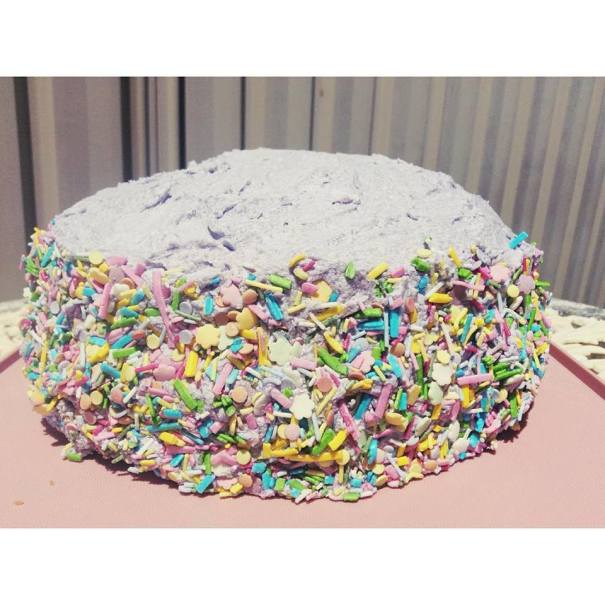
I was asked last minute if I cook bake a vegan birthday cake last week. Seeing as I haven’t baked in such a long time, I wanted to create something that was fun and also funky to look at. What’s more fun than a Funfetti cake!? Am I right folks. Now I haven’t posted a recipe on this website for quite some time. At the time I was transitioning into a vegan while also still running my baking business. As of 2018 I am a full vegan. So now on, please expect nothing more than vegan recipes. This cake was extremely popular on my Instagram and I had many requests asking for the recipe, so here we go…
INGREDIENTS
BOWL 1:
3 C Flour
1 1/2 C White Sugar
1 T Baking Powder
1 t Salt
1 1/4 C Almond Milk
2/3 C Vegetable Oil
1 T Vanilla Extract
Bowl 2:
3/4 C Chickpea Juice (Aquafaba)
1/2 t Cream Of Tartar
1/3 C Sprinkles
Cake Frosting:
1/2 C Dairy Free Butter
1/2 C Copha
3 C Icing Sugar
1 T Vanilla Extract
METHOD:
1. In a large bowl, add your flour, sugar, salt and baking powder. Using a whisk, stir until all the ingredients are combined. Now add the milk, vegetable oil and vanilla extract to the rest of the mixture and stir to combine all of it.
2. Open a can of Chickpeas, put a bowl under a colander and drain the chickpeas. One can should be equal 3/4 C of the juice you’ll need. In your second large bowl add the juice and cream of tartar. Use a stand mixer or hand beater to combine and stiff peaks form. It should take about 6 minutes.
3. Pour your second bowl into your first bowl. Using a spatula, fold the aquafaba mixture into the first mixture. The batter is thick so it make take a little time so be patient. Once combined, add your sprinkles. Stir in quickly, 3-5 times. If you stir it too much, the sprinkles will bleed.
4. Divide the batter into two 20cm cake pans. Bake your cakes in your preheated oven (180 degrees) for 35-45 minutes. Use a skewer to test to see if cakes are cooked in the middle. Place on cooling racks, don’t ice until they have cooled down.
5. Use a saucepan on a high heat to melt your copha. Allow to cool. In a large bowl, use your stand mixer or hand beater to mix the dairy free butter, copha, icing sugar and vanilla extract. Keep mixing until you have a fluffy consistency. Add some almond milk if you feel the frosting is too dry.
6. Put your cake on a baking tray with some baking paper underneath. Using a spatula, ice your cake. Start on the bottom and work your way to the top. When placing the second cake on top, make sure that it’s even. Work around the edge of your cake by placing the sprinkles on the side. Make sure you press them on gently. Keep applying the sprinkles until the cake is completely covered.